When most people think of the core, the first thing they automatically think of are the superficially located ‘’six-pack’’ muscles. After all, infomercials, magazine covers, many social media fitness “pros” and other media sources absolutely glorify the six-pack.
If you’re not looking beyond six-pack abs, I have news for you: there’s a lot more to the core.
The core consists of almost all of the muscles in the human body aside from the limbs. As a unit, your core is largely responsible for stabilizing the spine and providing your body with the ‘’stiffness’’ necessary to limit excessive movement and protect you from injuries — movements including extension, rotation, and lateral flexion.
Don’t underestimate the importance of having a strong core. Many people falsely believe that the best way to train the core is to perform endless rounds of crunches or sit-ups. In reality, these types of exercises don’t result in as much core strength development as many are led to believe.
Register for the Women’s Strength and Empowerment Weekend!
Spots are going fast, and it always sells out!
Let’s be honest, “core strength and stability training” is just not as marketable or appealing. It may not be “sexy,” but having a strong and bulletproof core will improve your performance in the gym and in your athletic endeavors, it will allow you to thrive in everyday life, and it will help make you more resistant to injury.
Core training includes core stability and core mobility. The following are four of my favorite exercises that address core stability. While the main goal of these exercises is to target the musculature of the anterior core (including the rectus abdominis, transverse abdominis, and the internal and external obliques) all of them also challenge other important core muscles.
Note: Before you attempt any of these exercises, be sure to watch each video and read the cues carefully. If you’re unable to perform an exercise as demonstrated and described, do the regression first and work your way toward the next variation as you build up your strength and stability. If you’ve mastered the regression and the demonstrated exercise, give the progressions a try.
Renegade Row with Lateral Band Resistance
For those of you not familiar with a renegade row, the standard version of this exercise involves performing a dumbbell row from a push-up position. This innovative variation targets the muscles of the anterior core. Due to the lateral band attachment, it challenges the oblique muscles significantly more than the standard version. This exercise also strengthens the muscles of the back, arms, and glutes.
Equipment needed:
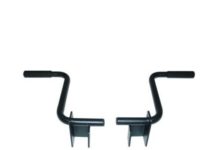
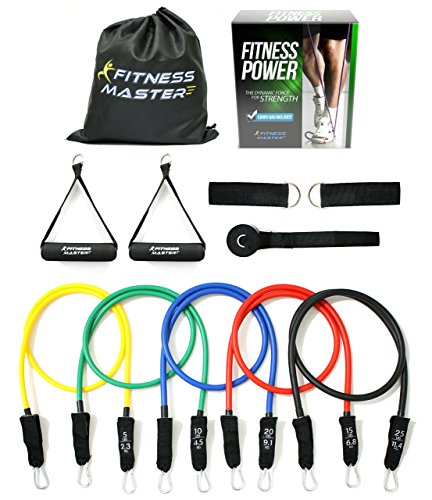
You will need a resistance band and a secure post, column, or rack on which to fasten the band. The thicker the band, the more challenging the exercise will be.
Coaching cues:
- Fasten a resistance band around a secure post, column, or rack, and loop it just above your hips. Move far enough away to apply a moderate amount of tension to the band (not too much).
- Get into the “top” position of a push-up, maintaining a straight(ish) line from your head to your heels. Your spine should be in a neutral position, with your chin tucked (pretend to make a slight “double chin”).
- Set your feet about hip- to shoulder-width apart. The closer together your feet are, the more challenging the exercise will be. Your knees should be slightly bent
- Set up the weights so they are directly underneath your shoulders. Grab a dumbbell with each hand. Your shoulders, elbows and wrists should be stacked on top of each other. Keep your shoulders packed for the duration of the exercise.
- Before each rep, take a deep breath in through your nose, brace your core, gently tuck your ribcage down toward your hips, and squeeze your glutes. This will help keep your body in the proper alignment and will allow your anterior core to stabilize your pelvis and spine.
- Row one dumbbell at a time from the floor, to your ribcage, initiating the pull with the muscles in your mid-back, not your arms. Your forearms should remain in a vertical position, and your elbows should remain tight to your sides.
- As you perform the rowing motion, think about squeezing your shoulder blade together and down. Pretend that you are trying to gently tuck your shoulder blade into your back pant pocket on the opposite side.
- Maintain proper alignment for the duration of the exercise. Aside from your rowing arm, your body should remain completely still.
- Reset before each rep. If not, you will lack the stability to maintain proper alignment and perform the exercise correctly.
- Keep your weight equally distributed on both feet and don’t allow your body to move at all. Inability to keep your body from rocking side to side or to keep your weight from transferring from foot to foot is often indicative of poor lumbopelvic stability (which can contribute to low back pain and, in some cases, incontinence).
Regression:
Perform a standard renegade row without the resistance band.
Progressions:
Use a band with more tension, or add chain or other weight resistance across your mid to lower back region. You can also elevate your feet. Avoid placing anything on your shoulder blades as it will interfere with proper scapular movement.
Side Plank on Wall with Leg Abduction
This extremely challenging exercise most notably targets the obliques. It also strengthens the glutes and develops shoulder stability.
Equipment needed:
You just need your own bodyweight and a wall to perform this exercise.
Coaching cues:
- Start in a side plank position, with the bottom hand on the floor and both feet up against the wall. Position your hand so it is below your shoulder (though slightly past your shoulder is also OK). Strive to keep your spine neutral, maintaining a a line as straight as possible from your head to your feet.
- The lower you place your feet on the wall, the more challenging the exercise will be.
- Once in position, gently tuck your ribs down toward your hips, contract all of your core muscles, squeeze your glutes, and slowly abduct (or lower) your bottom leg toward the floor, then bring it back to the starting position. Reset and repeat.
- Focus on inhaling deeply through your nose (visualize 360 degrees of air around your spine) and exhaling out of your mouth the entire time.
- Keep your abducting (bottom) leg as relaxed as you can so your core muscles do the majority of the work.
- Maintain proper alignment for the duration of the exercise. Aside from your abducting leg, your body should remain completely still.
Regression:
Perform this variation of the side plank, without the leg abduction, holding for time.
Progression:
Add a dumbbell hold or a bottoms-up kettlebell hold with the top arm.
Half-Kneeling Bottoms-Up Kettlebell Press
This fantastic big-bang-for-your-buck exercise strengthens the anterior core muscles, and trains the body to resist both extension and lateral flexion. It also targets the muscles of the shoulders, chest, back, and arms and is great for strengthening the shoulder stabilizers. As if that’s not enough, this exercise also strengthens the glutes.
Equipment needed:
You will need a kettlebell to perform this exercise.
Coaching cues:
- Start in a half-kneeling stance with your legs hip-width apart.
- Keep all of your weight over the middle/back of the foot in front of you, keeping your toes down and spread (particularly your big and baby toe).
- Your spine should be in neutral alignment, and your ribs and pelvis should be level.
- Grab the horn of a kettlebell in a bottoms-up position — you can use your other hand to help you get into position safely. Unless you’re already comfortable with bottoms-up exercises, I recommend that you start with a very light kettlebell until you get the hang of it.
- Before each rep, inhale deeply through your nose, and just as you perform the overhead pressing movement, forcefully exhale through your mouth. Brace your core, gently tuck your ribcage down toward your hips, and squeeze your glutes. This will help keep your body in proper alignment and will allow your anterior core to stabilize your pelvis and spine.
- Contract your shoulder muscles and extend your elbow to press the kettlebell straight up into an overhead position. Your arm should be vertical with your biceps close to your ear.
- It is important that when pressing the kettlebell overhead, you do not shrug the shoulder, arch the lower back, or flare the ribcage. People often make up for lack of mobility or strength by doing one or all of the above. If you find yourself doing any of these things, try a lighter weight or start with one of the regressions below.
- Lower the kettlebell to the starting position with control.
- Maintain proper alignment for the duration of the exercise. Aside from the arm that is pressing the kettlebell, your body should remain completely still.
- Reset before each rep. If not, you will lack the stability to maintain proper alignment and perform the exercise correctly.
Regression:
Perform this exercise using a kettlebell starting in a normal rack position instead of bottoms-up, or using a dumbbell. To regress this exercise even more, instead of half-kneeling, you can start from a standing position, or from a seated position (with no back support).
Progression:
When you’re ready to make this exercise more challenging, you can try one of two things: increase the weight, or keep the same weight but perform negative repetitions, taking three to five seconds to lower the weight each time.
Ipsilateral Bird Dog with Single-Arm Row
Has the bird dog become too easy? If so, allow me to introduce the ipsilateral bird dog with single-arm row (with thanks to Dr. Joel Seedman of Advanced Human Performance for putting this on my radar!). This exercise is a great progression of the bird dog and really challenges all of the core muscles. This variation prevents you from “cheating” with momentum — if you do, you will topple right over! It really forces your rowing form to be spot-on.
Equipment needed:
You will need a bench and a dumbbell to perform this challenging, full-body exercise.
Coaching cues:
- Unlike the standard bird dog, place your arm and leg on the same side of your body on the bench (for example, right arm and right leg).
- Grab a dumbbell or kettlebell with your free hand, and lift and extend your free leg behind you so that it is parallel to the floor.
- Keep your spine in a neutral position with the front of your body facing the floor. It is common for the hip on the same side of the extended leg to rotate toward the ceiling if you’re not being mindful about your alignment.
- Before each rep, inhale deeply through your nose, brace your core, gently tuck your ribcage down toward your hips, and squeeze your glutes. This will help keep your body in the proper alignment and will allow your anterior core to stabilize your pelvis and spine.
- Initiate the pull with the muscles in your mid-back, not your arms. Your forearms should remain vertical, and your elbow should stay close to your side as you bring the weight up toward your body.
- As you perform the rowing motion, think about squeezing your shoulder blades together and back. Pretend that you’re trying to gently tuck your shoulder blade into your back pocket on the opposite side.
- Maintain proper alignment for the duration of the exercise. Aside from your rowing arm, your body should remain completely still.
- Reset before each rep. If not, you may lack the stability to maintain proper alignment to perform the exercise correctly.
Regression:
Perform this exercise using the basic bird dog variation stance, placing opposite hand and leg on the bench. To further regress this exercise, perform it from the floor instead of a bench, touching or resting the weight on the floor at the bottom of each repetition.
Progression:
This is about as challenging as it gets, but you can work toward increasing the weight you use for this exercise.
Save $200! Early bird price for the Women’s Strength & Empowerment Weekend ends soon!
The Women’s Strength and Empowerment Weekend, powered by Girls Gone Strong, was designed to create a space for women to rise, teach, lead, learn, and connect with one another. Throughout the weekend you’ll hear from some of the most well-respected women in the world from every facet of the health and wellness industry, from PhDs to Registered Dietitians to top CrossFit athletes, and pre and postnatal fitness and body autonomy experts.

You’ll be surrounded by a group of like-minded, strong women who are there to lift each other up, and help each other become the best version of themselves in a warm, welcoming, and inclusive environment.
You will leave the weekend feeling heard, loved, supported, and empowered and most importantly knowing that you have finally found your tribe.
Last year we sold out in just 26 hours, so if you’re interested in attending, click the button below.
The post 4 Core Exercises You Haven’t Tried appeared first on Girls Gone Strong.


